Showing posts with label MakeUpForEver. Show all posts

Monday, March 7, 2016

Review - Make Up For Ever Ultra HD Foundation

Hello gorgeous!
All of you must have heard that Make Up For Ever launched its highly anticipated Ultra HD Foundation recently. So much hype about this product and when it hit the store, I went and tried it. And let me tell you this, the hype is true. Make Up For Ever Ultra HD Foundation has been my go to foundation for a flawless complexion lately and I even dare to say that it has become one of my holy grail products. 


It was a long time ago when I first tried MUFE HD Foundation and for me the foundation has a good coverage but still felt a bit heavy on the face. Perhaps I did not get the right shade as well before so I did not use them as much. Make Up For Ever now reformulates the HD Foundation to accommodate the development of digital era where high definition is not enough anymore, a 4k digital technology which will capture a more detailed objects and picture clarity beyond measure. The new MUFE Ultra HD Foundation is something else and this time, I made sure that I chose the right shade. At first I was a bit confused with the new coding of shades because now the improved formula has 40 shades for you to choose (amazing, yes?). Googling around a bit and I will try to help you understand the new numbering system that MUFE has.


The shades are categorised by two undertones, yellow and red, hence the Y and R letter in front of the numbers. The foundation starts with number 2 means it’s on the light shade, and number 3 is medium shade.  The bigger the number, the darker the shade. So, the first thing that you have to do is to think about your skin undertone colour, whether its red (pink) or yellow undertone. Then you go from there to choose the numbers and think about whether you are in the light or medium shade or even tan or dark. 


As for me, my skin is yellow undertone, so I will not look at the R coded foundations. Then, I consider myself in the light shade, so I start looking at the foundation with number 2 in the front starting from the smallest number which is Y225. I did have a dilemma between Y225 and Y245 because both of them seemed to look the same on my skin hahaha.. But then I decided to choose Y225, thinking that I need a foundation that could light up my complexion. Hope my explanation helps a bit. You can also check the comparison with the old HD Foundation here if you use your previous shade as guidance.


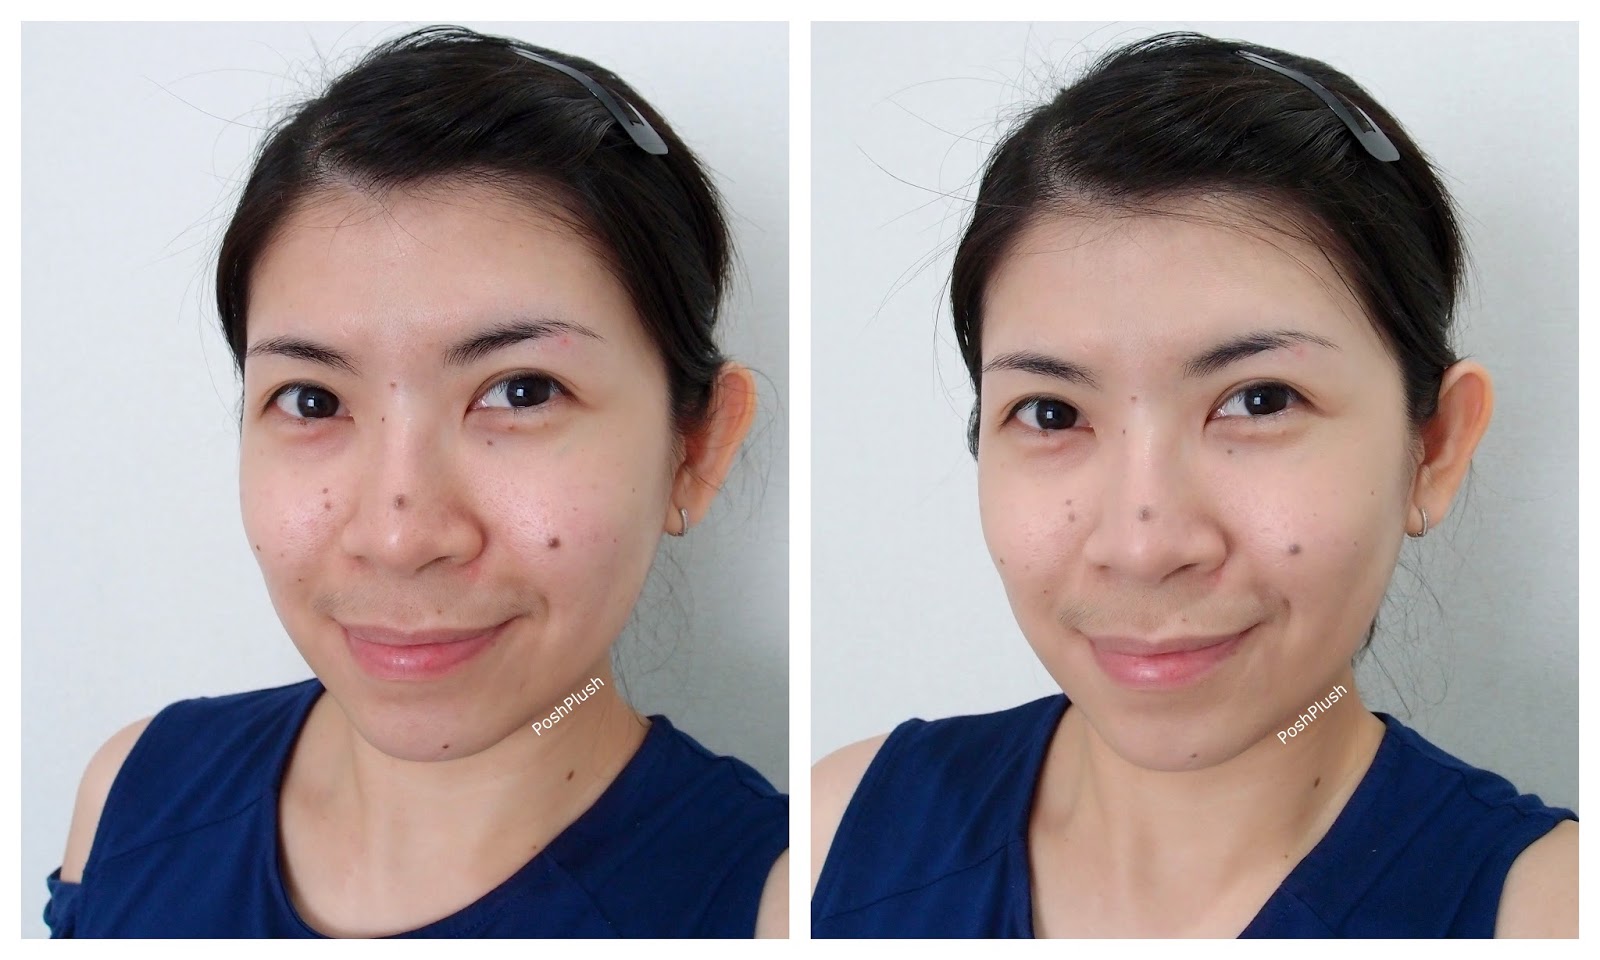
Let’s talk about the packaging, it still comes in the same cylinder glass bottle (30ml) like the previous version. It has the same pump to dispense the product out too. I personally like the packaging, it looks sleek, compact, and the cap closes tightly. The texture is lighter than the HD Foundation and it glides pretty well on the skin. The coverage is medium to high depending on how many layers you want to build on your skin. I usually never layer it for my daily look, because I find one layer is enough to enhance my skin complexion. But if I apply it for special occasions such as going to a wedding or party look, I will layer it to really achieve that flawless skin. The finish is semi matte because I still can see the glow on my skin, but if your touch it, it doesn’t feel greasy or balmy, love love it! I usually apply it with my fingers instead of sponge because sponge application somehow always makes foundation (any foundations) looks cakey on me. I have not try to apply it with brush though because I don’t have any foundation brush hehehe.. 


The foundation alone already gives a wonderful result on my skin, but I found it works really well when I apply Benefit Porefessional Primer under it. I have big pores, so any help in hiding them is highly appreciated. I tried using Hourglass and Three primer too, while the result is also great, both primers combined with MUFE Ultra HD Foundation provide a more glowy finish on my skin. Staying power is also good, it last 8 hours without primer and 10-12 hours with primer on me. The only minus point is it doesn’t have any sun protection due to its function for a digital purposes. But then again, you cannot take foundation’s sun protection seriously. You need a real sunscreen under your makeup. 


All in all, MUFE Ultra HD Foundation is an amazing product. I love it so much and definitely will repurchase when it’s finished. With the wide range of shades, I believe the foundation can cater everybody’s skin well. It sits comfortably on my skin, feels like second skin in fact. Love the finish that did not feel sticky or balmy but not powdery on the other side. It’s just right.
Please pardon my excitement because I love this product so much hahaha.. Have you tried them? If yes, please share your thoughts on it on the comment box below.


Have a great week gorgeous people! Who’s excited that we’re going to have a mid week break this week? 


Cheers,


Stef


Wednesday, October 28, 2015

Halloween Look - Porcelain Doll (Pretty, Broken, and Hollow Eyed)


Hello everybody! It’s me again here.. back with my Halloween Look part II. 

This time, I try to recreate a porcelain doll from pretty one to hollow eyed doll. Porcelain doll sometimes gives me a creep with their big eyes and well their eyes basically. I was inspired by BJD dolls too. BJD stands for Ball Jointed Dolls. The dolls are very beautifully made with human like appearance. I was trying to achieve that kind of look, but of course the plan on my mind and my makeup ability is not synchronized. So, this is the best porcelain doll look that I can make so far. It’s my first time creating it too, so I don’t have any comparison actually hahaha..

Sooo gorgeous!! Pic from here
My hollow eyed look inspired by Lex from Madeyewlook. Check her youtube account, you can find other tutorials from creepy one to cute one such as emoji makeups. She’s awesome!  

Before all that makeup magic


I spent 3 hours for creating this look, a lot longer than the previous vampire makeup. Simply because at first, I don’t know what to do hahaha.. So after finished putting on my base makeup, I was like uhmmmm, what should I do next? I watched doll makeup tutorials but I was really nervous that I’m going to make a mistake and ruin my whole look, so I literally just stopped and stared at my reflections on the mirror. I tried to watch some makeup tutorials again to help me gain my confident back and started to work on the look.
Same as the previous post, I will not give a tutorial on the look because my makeup technique is down beyond par the others and still need a lot of improvement. But, I will give you some important notes that could help you create this look. I did photoshopped my face a little bit which is removing all my moles to achieve the porcelain skin. But the other parts are real makeup, no photoshopped or even beauty camera.

Sssshhh!! Don't tell anyone that I will come to play

 
  • Primer before makeup. Porcelain doll has porcelain skin which is smooth and poreless. A pore perfecting primer to cover your pores will be an excellent choice for this look.

  • Thin or natural eyebrows. A gentle stroke with your eyebrow pencil to define your eyebrows. A porcelain doll should look delicate not fierce.

  • White eyeliner to make your eyes look bigger.

  • Take out your fabulous lush falsies to play. This time, we go big. Upper lashes and lower lashes should have falsies to achieve that dolly eyes.

  • Go crazy with your circle lens too. The bigger the better.

  • Shading and highlighting is always on the game. Contour your nose, philtrum (upper lips area), and chin.

  • A rosy lips and cheeks to complement the look


Now, some points for making the creepier porcelain doll look.

  • Practice your crack drawing before hand to make sure your cracks look real. Don’t be afraid to make mistakes, a cotton bud with makeup remover can always solve the problem. I use liquid eyeliner to create the cracks.

  • Cover your lips with foundation and use black eyeshadow to make a dark gradient lips. If its not dark enough, add black eyeliner on your inner lips.

  • To create sunken eyes, swipe black eyeshadow around the hollow of your eyes. Don’t forget to blend it well.

  • To create hollow eyed, use your black eyeliner all over your eyelid and lower eyes with the guidance of that hollow part of your eyes. Blend it with black eyeshadow to create an illusion that your eyes are hollow.

  • Took off your all your falsies when you take picture of the hollow eyed look because errr no eyes means no falsies, rite?

Products that I used:

Benefit The Porefessional Primer
Shu Uemura Lightbulb Foundation shade 764
PAC Creamy Foundation in White
Beauty Story Luminous Primer
Shu Uemura Eyebrow Pencil Hard Formula in Seal Brown
Etude House Color My Brow shade No. 4 Natural Brown
Urban Decay 24/7 Eyeliner in Zero
Urban Decay Naked On The Run Palette shade Fix (to contour) and Dare (for the eyes)
Urban Decay Eyeshadow Perversion (black color)
Eyeko Eye Do Liquid Eyeliner
Make Over Eyeliner Pencil in White Techno
Etude House Cookie Blusher in Marshmallow Pink
Colourpop Lippiestix in Fetch
Make Up Forever Artist Plexi Gloss No.201
No brand falsies that I bought in Bangkok
Kawaii Angel Circle Lens in Gray (bought from Kawai Gankyu)
Kimiko Wig in Coffee Brown (bought from Pinokobeauty)

That’s all I guess. I had so much fun creating this look and my sister helped take pictures of me. I supposed it’s not that scary when it’s daytime but I don’t think I will do it on night time hahahaha..

Creepy Dolls can have fun too ;)
Which Halloween makeup that you like more? The vampire look or this porcelain doll look?
Are you ready for Halloween now?? Cannot wait for next Halloween to create more fun and creepy look.

Cheers,

Stef


Saturday, August 8, 2015

Event : Make Up For Ever Artist Plexi Gloss Launching


Hello gorgeous! Last week, I was invited to attend the launch of Make Up For Ever Artist Plexi Gloss. Make Up For Ever is known for their excellent quality of makeup products. Founded by a makeup artist, Dany Sanz, it’s no wonder that their products have been makeup artist favorites too. Me myself have tried some such as MUFE HD Foundation, Lift Concealer, and Aqua Eyeliner. Their products are so versatile and crafted really well. Your vanity needs them! 


This month they launched their newest product, Artist Plexi Gloss. It’s a lip lacquer with lipstick coverage and lacquered shine. Plexi Color Technology gives you a highly pigmented color of the gloss and PrizmaliteTM will deliver a vinyl shine finish and mirror like reflection. There are 35 colors to choose, 14 pearly shades and 21 non pearly (solid colors include one transparent). Imagine the limitless creativity in creating your lips look.

MUFE divided the colors into color codes:
100s : Nude and beige colors (100Ps : Nude and beige pearly colors)
200s: Pink colors (200Ps: Pink pearly colors)
300s : Coral colors (300Ps : Coral pearly colors)
400s : Red colors (400Ps : Red pearly colors)
500s : Artist colors (500Ps : Artist pearly colors)

Below are the swatches of some of my favorite shades. I was so overwhelmed with the amazing shades, I did not noticed the codes until later. So, I’m sorry if the swatches are not complete. 


As you can see, the colors are pigmented and really payoff. I especially adore the red and the hot pink shades. I fell in love with shade 405P, it’s a pearly marsala wine color. Jotted it down on my makeup wish list.
The artist colors became the most favorite shades to swatch by the beauty bloggers because when else can you play and experiment with those bold and crazy colors other than now. 

The Plexi Gloss also claimed to have 5 hours of staying power, a remarkable hours for a lip lacquer. Its superflex applicator also makes the application really easy too. The high precision paddle tip helps to apply the lacquer evenly on the lips without straying out of the line. The gloss reservoir, a small dent on the applicator, controls the amount of product coming out of the tube, ensuring a sufficient amount of gloss to be applied to the lips. So, one or two swipe is all we need to get that shiny and full lips. The applicator is also flexible and soft, definitely safe for any kind of lips. 


After a brief explanation about the product, given by Ms Sally Buntoro, MUFE Indonesia Public Relations Executive, an ombre lips demo was shown. The makeup artist showed us how to use Artist Plexi Gloss two ways, the first one is a full application on the lips, and the second one is applied to create an ombre lips. 


As you might be able to guess, afterwards, we were challenged to create our own ombre lips using Plexi Gloss. We can be as creative as we want by using other MUFE products available on the counter as long as the basic product used is the Plexi Gloss. You can imagine the excitement amongst us and immediately we went here and there grabbing the stuffs that we need to create the ombre lips. 
Since yours truly still hesitant to apply the artist colors (I felt like dark color lips are too vampy and unfit my overall looks), I chose to create a mix of pink and orange shade, I proudly called it O-pink! I was thinking about summer colors that day and I thought that I want to create a look that you can pull on summer days. 


Here’s the how to part (pardon me for unable to recall the precise codes of the products I used because I was too excited with doing the challenge).
At first I lined my lips with Aqua Lip Liner in Coral Orange, and then I started to apply the red orangey Plexi Gloss (its 300 if I’m not mistaken) on top of the liner and around the outer area of my lips aka framing the lips. I chose 2 pink shades to fill my inner lips, applied the lighter one first and then dabbed the bolder one on top of it. Voila! Its done! What do you think of my O-pink lips? Summery enough?

The great part is even though I layered 3 colors on my lips, it didn’t feel thick on my lips and the product stay still on my lips nicely. I will do separate review on Artist Plexi Gloss on other post later on and will share more experience wearing it. 


I still have time to mingle and chat (with a lot of selfie and taking pictures together of course) with the other beauty bloggers before the event ended. I had a blast on the event and it the highlight of my week. Artist Plexi Gloss has launched on August 1st, 2015 and you can find them on MUFE counters. Have you tried them? If yes, please tell me what do you think about them? 

Currently, I am having a giveaway (Yes! it is my first ever giveaway! Sooo excited!) sponsored by Make Up For Ever. I am going to pick 3 random winners which will get one Artist Plexi Gloss each (colors are random). To join my giveaway, scoot out to my IG, @stefaniecarolina for the rules and how to. It will be closed on August 9th, 2015 at 11.59pm and I will announce the winners on August 12th, 2015 on my IG page. What are you waiting for?!! Join it right away!

Thank you Make Up For Ever Indonesia for inviting me! I wish you the utmost success for the launch of Plexi Gloss and sending you much love from here! *smooches*

For more information on Artist Plexi Gloss, you can contact Make Up For Ever Indonesia on their social media outlets:

Facebook : MAKE UP FOREVER Indonesia

Instagram : makeupforeverID

Twitter : MakeUpForEverID

Cheers,
Stef